
How to Prevent Leaks in a Glass Shower by Directing Water

A glass shower can leak through a gap between panels even when the glass is intact. Preventing leaks in a glass shower starts with directing water toward the drain and managing the openings between panels.
Panel alignment, installation details and showerhead placement all affect where water travels. When preventing leaks in a glass shower, a professional assessment considers these factors together instead of treating every puddle as a caulking problem.
This guide explains how professionals assess panel position, thresholds, door hardware and gaps. Understanding these details makes preventing leaks in a glass shower more manageable and helps you know what to discuss when water escapes the enclosure.
Table of Contents
Aligning glass panels and directing water toward the drain
Caulk cure time depends on the sealant, so the installer follows the product instructions and keeps the shower unused until it is fully cured. Sealing weep holes or drainage gaps can trap water in a track or behind a channel, causing pooling and leaks.
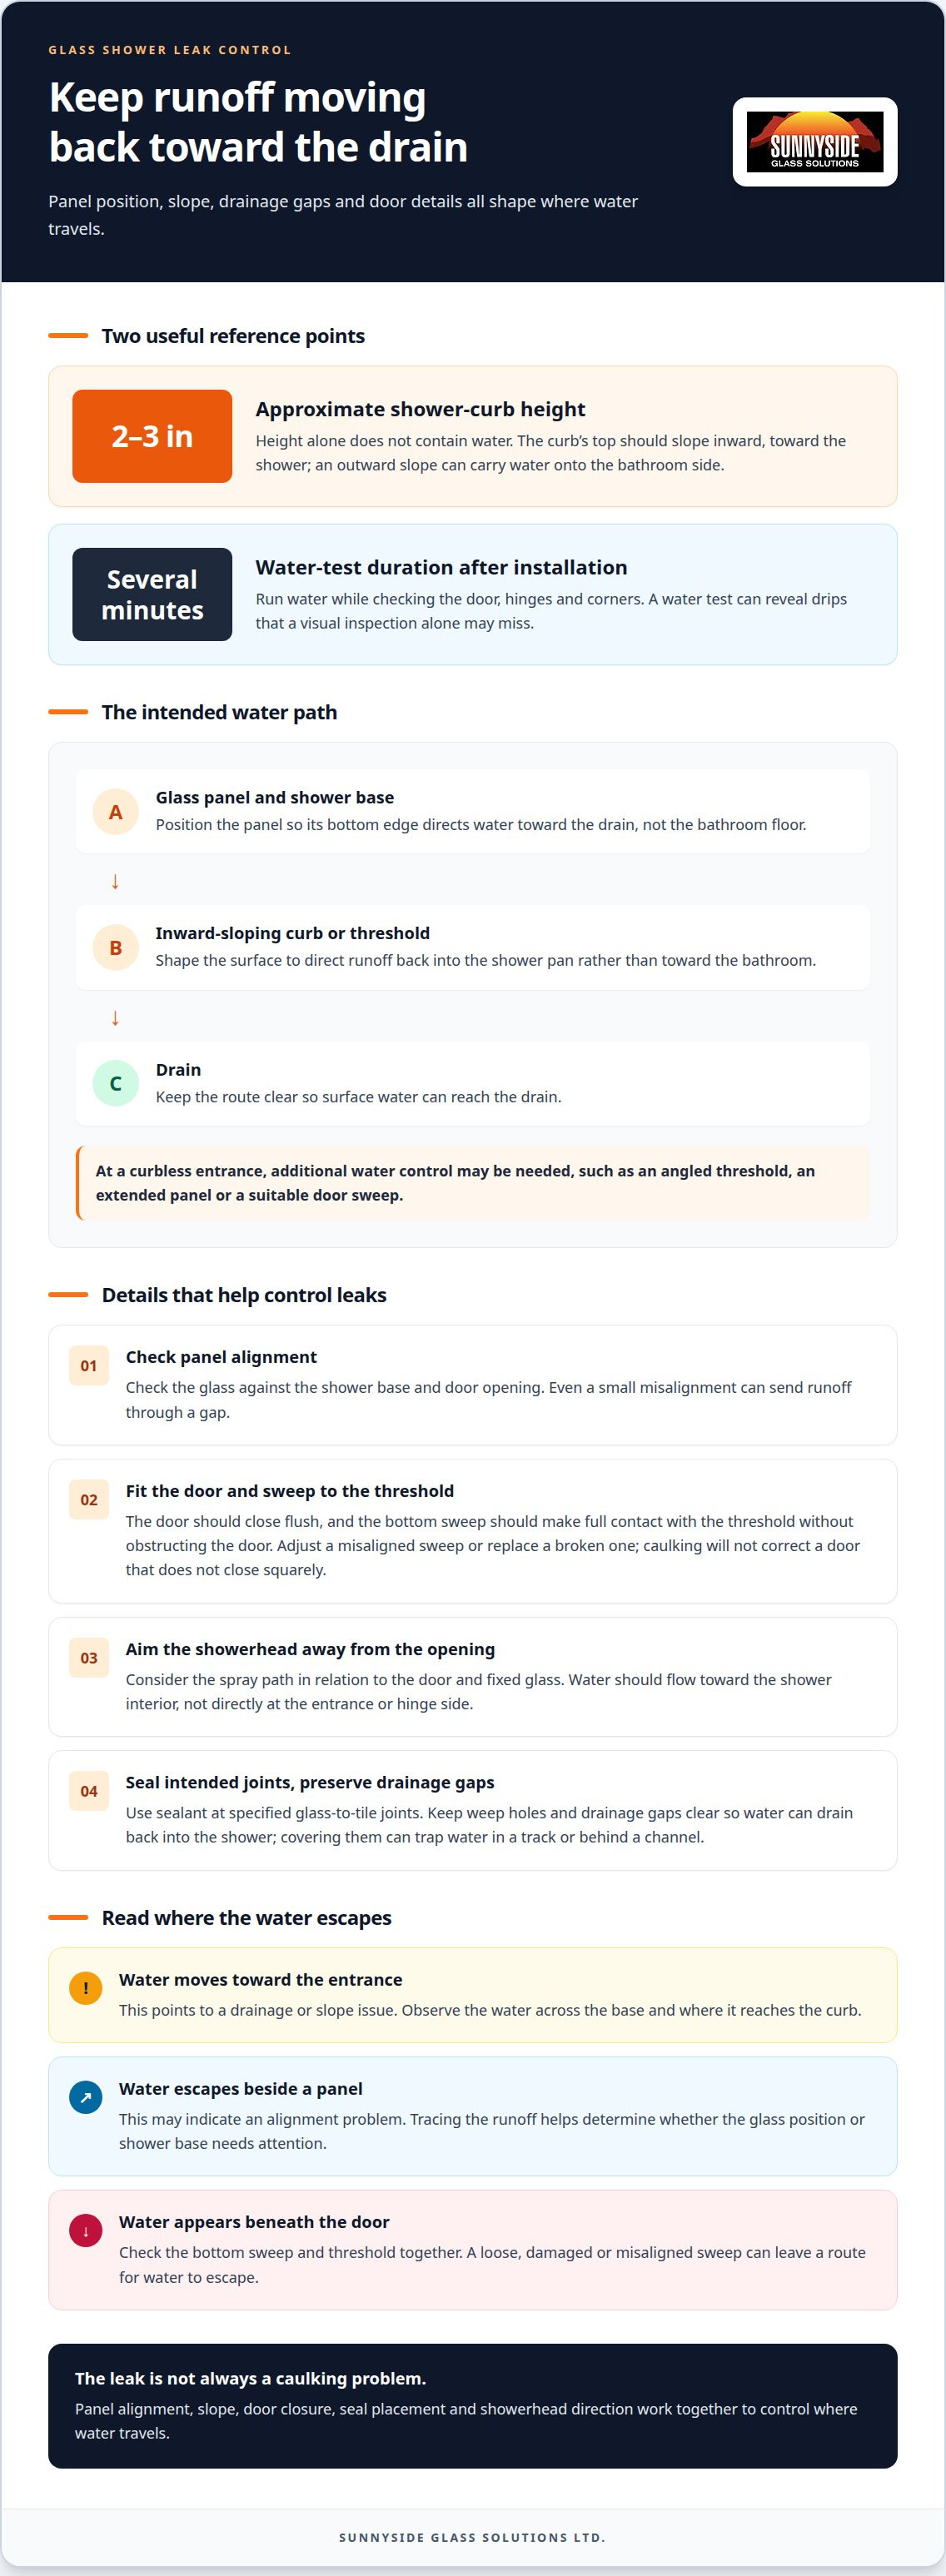
How professionals align glass panels to help prevent leaksPosition each frameless panel so its bottom edge directs water toward the drain, not the bathroom floor. Check the glass against the shower base and door opening, as even a small misalignment can send runoff through a gap. At a curbless entrance, plan additional water control, such as an angled threshold, an extended panel or a suitable door sweep.
How professionals slope the curb towards the drainAssess the curb before setting the glass, and confirm that its top slopes inward toward the shower. Shower curbs are approximately two to three inches high, but height alone will not keep water inside if the surface slopes outward. An outward slope can carry water onto the bathroom side. If the curb does not slope enough to contain water, the underlying tile work may need correction.
Trace the runoff path. During a controlled water test, observe how water travels across the base and where it reaches the curb. A stream moving toward the entrance points to a drainage or slope issue, while water escaping beside a panel may indicate an alignment problem. Identifying the path helps the installer determine whether the glass position or shower base needs attention.
Keep drainage openings clear. Have the installer distinguish intended drainage gaps from spaces that need sealing. Weep holes in a track or channel let water drain back into the shower; covering them can trap water. Caulk belongs at specified joints, not across openings designed to let water escape. This preserves the drainage route and helps direct surface water toward the drain.
Leaks caused by improper installation
A door can leak soon after installation if its threshold, seals or alignment are incorrect. Professional fitting addresses these details before water testing.
Have a sloped threshold professionally installedHave the installer shape the threshold with a gentle slope back into the shower pan. Check that the finished surface directs runoff inward rather than toward the bathroom floor. The threshold and glass must work together: a correctly positioned door sweep should meet the threshold without obstructing the door. If the tile is already finished, take final glass measurements afterward for an accurate fit.
Preventing leaks at thresholds and hinges with professional installationHave the installer confirm that the door closes flush and the bottom sweep makes full contact with the threshold. At the hinges, vinyl strips can deflect water away from hinge cutouts and back toward the shower base. A loose or damaged sweep can leave a route for water to escape, so the installer can adjust a misaligned sweep or replace a broken one. Caulking will not correct a door that does not close squarely.
Seal the specified joints. Ask the installer to apply clear, mould-resistant sealant where the glass meets tile, including floor joints and vertical walls. Silicone accommodates movement at glass-to-stone or glass-to-tile joints. Sealant should follow the intended seams, not cover drainage openings that need to remain clear. A poor seal at a corner can let water travel behind the enclosure, even when the door appears properly aligned.
Stabilize the channel and test the finished enclosure. If the subfloor flexes under weight, the installer should shim the floor channel to prevent wobbling. After installation, a water test should run for several minutes while the installer checks for drips around the door, hinges and corners. This reveals leaks that a visual inspection alone may miss. For a fitted enclosure, professional frameless glass shower installation can address the fit and sealing details together.
Professional shower head placement away from door openings
A showerhead aimed at the opening can spray directly onto door seals. Professional placement considers the spray direction, enclosure layout and door hardware together.
Position the showerhead away from the opening. Have the installer assess the spray path in relation to the door and fixed glass. Water should flow toward the shower interior, not directly at the entrance or hinge side. This reduces repeated spray on vulnerable joints and helps the enclosure direct water back toward the base.
Identify where water first escapes. Common leak points include the bottom of the door, the door-to-wall junction, seals and hinges. A controlled shower test helps distinguish a spray-direction problem from a worn sweep or poorly seated seal. If water appears beneath the door, the bottom sweep and threshold can work together to redirect it inside.
Specify suitable hinges and secure installation. Use wall-mounted, heavy-duty hinges rated for the glass thickness, with corrosion-resistant hardware designed for bathroom humidity. The installer should anchor hinges into a stud, not only drywall, to support the door and keep it square. Self-centering hinges can return a swinging door to its resting position, helping it meet the seals when closed.
Repair the actual bottom-door failure. A loose or broken sweep can let water pass beneath the door. A professional can replace a damaged sweep or adjust one that sits out of alignment, then confirm that it meets the threshold. Repair is appropriate when leaks continue during regular use or water reaches the bathroom floor. Persistent leaks can also point to a deeper alignment or installation issue.
Understand repair pricing and timing. In Canada, repair pricing depends on the situation and is provided after a quote request. Factors include the source of the leak, the condition of the sweep and hardware, and whether adjustment or replacement is needed. A professional assessment is useful when the leak persists, the door no longer closes squarely, or hinge movement affects the glass position.
Gaps between glass panels
Assess whether the gap is part of the design. Frameless shower doors need clearance to swing, so a narrow opening is not automatically a defect. The key question is whether a seal or sweep manages the space while allowing the door to move freely. If water escapes through the opening during normal use, note where it lands and whether the gap is between the door and wall or between separate panels.
Fit a seal where two panels fail to meet. A gap between glass panels can give water a direct route onto the bathroom floor. A correctly positioned door seal between the panels helps close that path without obstructing the door. Have the installer check the seal along the full meeting edge, since a seal that stops short can leave an open route at the top or bottom.
Protect overlapping sliding panels. Where sliding glass panels overlap, clear bumpers can help limit water escaping through the overlap. The installer should position them where the panels meet while preserving smooth movement along the track. If the panels no longer overlap evenly, a bumper alone may not solve the problem. Assess the panel alignment and the full opening together.
Address wide openings with a return panel. At a wide shower entrance, a fixed return panel with a vertical seal can help block splash from reaching the opening. Its placement should respond to the direction water travels, rather than simply covering the most visible gap. For a persistent panel-gap leak, arrange a professional glass shower assessment to identify whether the seal, overlap or enclosure layout needs attention.
Sunnyside Glass Solutions Ltd.
Sunnyside Glass Solutions Ltd. helps homeowners plan glass shower enclosures with attention to panel fit, door position and water direction. If a persistent leak points to gaps or an enclosure that no longer suits the shower opening, professional guidance can help clarify whether a frameless or semi-frameless design is appropriate. For a new enclosure, Sunnyside Glass Solutions Ltd. offers both options, tailored to residential spaces. Contact Sunnyside Glass Solutions Ltd. to discuss your glass shower project.
Plan the next step for a drier shower
A lasting approach to preventing leaks in a glass shower starts with treating recurring water as a reason to assess the enclosure, rather than simply cleaning the floor again. Before arranging professional help, note where moisture appears and whether it happens during regular shower use or after the door opens. These observations can help clarify whether the concern relates to the enclosure's fit, its opening or the way water reaches it.
Consider the result you want from the space as well as the leak itself. A solution should suit how you use the shower and how its glass enclosure fits the room. If water continues to escape or the door no longer closes as it should, a professional can assess the situation and discuss an appropriate next step.
Contact Sunnyside Glass Solutions Ltd. to discuss your shower enclosure. A carefully considered next step can help you move toward a shower that works better for your home.
Frequently Asked Questions
What are the common causes of leaks in a glass shower?
Leaks commonly occur at a door edge, panel junction, wall connection or shower base. The visible puddle may appear away from the entry point because water can travel along tile or a threshold. For example, moisture near a corner may come from a nearby panel joint rather than the floor seam. Where the leak appears helps narrow down its likely cause.
How can a professional find where a glass shower is leaking?
A professional can run the shower and observe the enclosure from outside, noting where moisture first appears. To narrow down the source, they can direct water toward one area at a time, such as the door edge or a panel joint, and watch for the first sign of escape. This helps distinguish a seal issue from water reaching the opening directly. The approach is useful for homes in Kelowna and surrounding communities.
How can a professional seal gaps between glass shower panels and walls?
A professional assesses whether the gap needs a flexible seal, a panel adjustment or a different enclosure detail. At a glass-to-wall joint, the sealant must suit the adjoining materials and cover the intended seam continuously. If the glass is out of position, adding sealant alone may leave an uneven opening. The right fix depends on whether water passes through the joint or around the panel edge.
How can a professional replace or repair glass shower door seals and sweeps?
A professional first identifies the seal's location and how the door moves, then checks whether it is damaged, loose or poorly seated. A worn sweep may need replacement with a compatible profile; a displaced one may need adjustment. The finished seal should meet the adjacent surface without catching as the door opens. This helps maintain a clear barrier while preserving normal door movement.
Should a professional caulk a frameless glass shower, and where?
Yes. A professional should seal designated joints where glass meets tile or stone, including relevant wall and floor connections. Caulk is not a substitute for correcting a panel that is out of position, and it should not block openings intended for drainage. For example, sealing a fixed glass-to-tile joint differs from sealing a moving door edge. The enclosure design determines which seams need sealant.
What type of silicone sealant should a professional use for a glass shower?
A professional should use clear, mould-resistant silicone at appropriate glass-to-tile or glass-to-stone joints. The product must suit the materials being joined, and the installer should apply it only to intended seams. Cure time varies by sealant, so leave the shower unused for the period stated in the product instructions. Correct placement matters as much as the choice of sealant.


Comments